
Aug 14, 2026Installation
How to Install WPC Fencing – A Professional’s Guide to a Lasting Boundary
NewYongTech supplies premium WPC fencing systems to contractors, developers, and distributors worldwide.
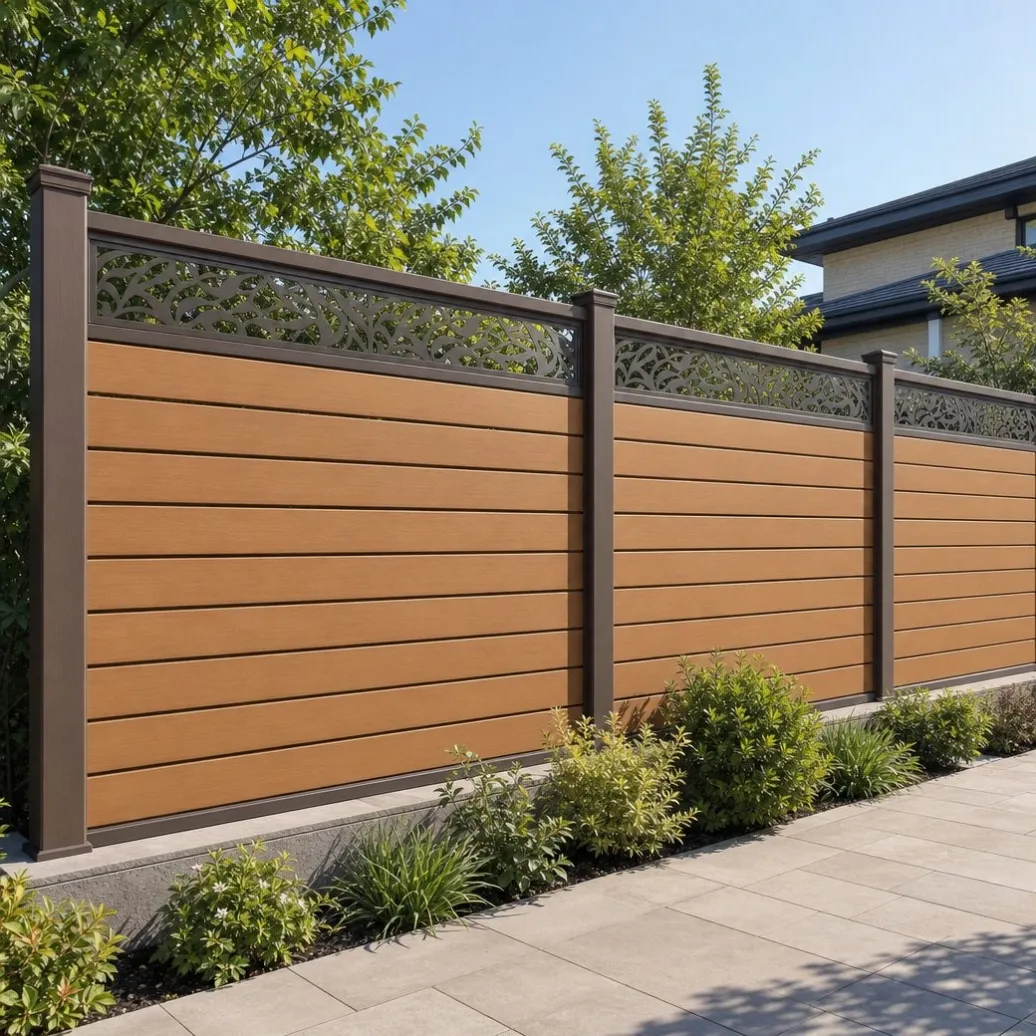
NewYongTech supplies premium WPC fencing systems to contractors, developers, and distributors worldwide. While our composite fencing is engineered for durability and low maintenance, the long-term performance of any fence depends heavily on correct installation. This guide walks you through the complete installation process — from planning and post setting to final finishing — based on industry best practices.
Before You Start: Essential Planning
Check Local Regulations
Before beginning any WPC fence installation, check local zoning laws and HOA rules that may regulate fence height, location, and style . Obtain necessary permits as required by local codes. Also confirm the location of underground utilities with local providers before digging .
Plan Your Fence Layout
Walk the proposed fence line to check for obstacles or obstructions. Use stakes and string to outline the fence line and mark gate locations . Since standard fence sections may not align perfectly with your layout, decide on a spacing method — you can either cut each section to the same width for equal spacing, or install sections as supplied and cut one section to fit the remaining space .
To calculate material quantities, divide the length of each segment by the width of a standard fence section and round up to the nearest whole number. Add approximately 10% to the total to account for waste .
Understand Thermal Expansion
WPC fencing expands and contracts with temperature changes. This is most noticeable in areas with extreme temperature variations . Boards fitted tightly against posts or each other without clearance can warp, buckle, or even crack the post channels on a hot summer day . Always leave a 3–5mm gap at the ends of boards (depending on installation temperature) using spacers to ensure consistency throughout the project .
Tools and Materials You Will Need
Materials | Tools |
WPC fence panels (boards) | Drill / impact driver |
Top and base capping rails | Circular saw / mitre saw |
Aluminum or WPC fence posts | Spirit level (4-foot recommended) |
Post caps | Tape measure |
Starter and intermediate clips | Shovel / post hole digger |
Stainless steel screws | Rubber mallet |
Post anchors / brackets | Chalk line / string line |
Gravel (for drainage) | Safety glasses, gloves, dust mask |
Concrete (post mix) | Carpenter's square (optional) |
Step-by-Step Installation Process
Step 1: Install the Fence Posts
For Installation on Soil
Mark post locations – Space posts at the manufacturer's recommended centre distance, typically 1.8m to 2.0m . Exceeding this can cause the fence to sag over time .
Dig post holes – Holes should be approximately 720mm deep and 280mm in diameter (or at least 1/3 of the total post height) .
Add drainage layer – Place 150mm of gravel at the bottom of each hole to allow water to drain away from the post base .
Set posts – Place aluminium or WPC posts vertically in the holes. Use a spirit level and string line to ensure posts are plumb and aligned .
Pour concrete – Pour concrete into the hole until there is 50mm depth remaining below ground level. Once dry, fill the remaining space with sand to ground level .
Allow concrete to cure – Concrete must be fully cured before hanging gates or fixing panels — typically 24–72 hours .
Critical Note: Never bury the bottom of a WPC fence panel directly in the ground. A minimum gap of 30mm must be allowed for drainage at the bottom of each fence panel .
For Installation on Concrete or Hard Surfaces
Mark post shoe positions – Measure and mark where bolt-down post shoes will be installed .
Drill anchor holes – Use an impact drill to drill holes in the concrete, aligning with the holes on the post shoes .
Secure post shoes – Fix post shoes to the ground using appropriate anchor bolts .
Insert posts – Slide fence posts into the post shoes and secure with stainless steel screws .
Step 2: Install the Base Capping Rail
The base rail provides stability and alignment for the fence boards.
Secure L-brackets – Attach L-brackets or connection clips to each end of the base rail .
Position base rail – Place the base rail between the installed fence posts, resting on the connection clips or L-brackets .
Fix in place – Secure at each end using stainless steel self-tapping screws through the bracket and post .
Step 3: Insert Fence Boards to Build the Panel
This is where the modular design of WPC fencing systems offers flexibility and speed.
Slot boards between posts – Stack fence boards one on top of another between the posts. Many WPC fencing systems use a tongue-and-groove interlocking design that makes alignment effortless .
Maintain expansion gaps – Leave a 3–5mm gap between the end of each board and the inside of the post to allow for natural thermal expansion .
Check orientation – If boards have different finishes on each side (e.g., woodgrain on one side, brushed on the other), install them uniformly with the same finish facing outward .
Step 4: Secure the Top Capping Rail
The top capping rail locks the entire panel together and provides a finished appearance.
Install L-brackets with foam inserts – Secure L-brackets into the top capping rail. The padded foam insert should sit on top of the final fence board .
Position top rail – Place the top capping rail on top of the final fence board .
Fix in place – Secure at each end using stainless steel self-tapping screws through the bracket and the post .
Step 5: Install Gate Posts and Gates (If Applicable)
Gates require additional support and careful alignment.
Use steel post reinforcements – For gate posts, slide steel post reinforcements inside the hinge posts. The open side of C-shaped reinforcements should face outward from the gate opening .
Set gate posts deeper — Gate posts should be set deeper than standard posts for added strength .
Check level – Ensure gate posts are plumb and aligned. The opening width for a standard double gate configuration is approximately 91–130 inches, depending on the system .
Install hinges – Attach hinges to gate panels (approximately 6 inches from top and bottom) using self-tapping screws. Pre-drill holes for easier installation .
Hang gate panels – Position gate panels in the opening and adjust for correct alignment. Secure hinges to gate posts .
Install latch and handles – Fit the latch to the inactive gate panel at desired height. Align the striker with the latch and install handles .
Step 6: Install Post Inserts and Post Caps
Insert post inserts – For systems with grooved posts, slide post inserts into the channel to conceal fixings and provide a clean finish .
Apply post caps – Secure post caps on top of each post using adhesive or colour-coded screws for a professional appearance .
Common Mistakes to Avoid
Mistake | Consequence | Prevention |
Ignoring expansion gaps | Boards warp, buckle, or crack in summer heat | Leave 3–5mm gaps at board ends; use spacers |
Incorrect post spacing | Fence sags or "frowns" over time | Max 1.8m–2.0m centre-to-centre spacing |
Shallow post holes | Frost heave or structural instability | 1/3 post depth minimum; gravel drainage layer |
No bottom drainage gap | Moisture trapped at base | Minimum 30mm clearance from ground |
Not pre-drilling holes | Board splits or mushrooms around screw head | Pre-drill pilot holes before fixing |
Using wrong fasteners | Rust streaks, fastener failure | Use 304 or 316 stainless steel screws |
Fence on a Slope: Two Methods
Stepped Method
Follows the slope in gradual steps; rails remain level. The downhill post will need to be set higher, and longer posts may be required .
Slope-Following Method
Rails follow the ground slope parallel to the ground. Post spacing may need to be reduced to prevent rails from being too short due to the angle .
Why NewYongTech?
A high-quality WPC fence installation starts with high-quality materials. NewYongTech supplies:
Privacy, semi-privacy, and slatted WPC fencing systems
Complete accessory kits – posts, rails, clips, and stainless steel fixings
Colour-matched post caps and trims – for a seamless finish
Comprehensive technical support – installation guides, project-specific advice, and engineering data
Whether you are a contractor specifying materials for a commercial perimeter or a distributor supplying to landscapers, we provide the products and expertise to deliver a flawless fence every time.
Request a Quote
Contact NewYongTech for:
Wholesale fencing and accessory pricing
Free sample boards and colour swatches
Installation datasheets and technical support
Bulk order quotes for contractors and distributors